Difference between revisions of "Programming the Device"
Jump to navigation
Jump to search
(New page: ==Requirements== ===Hardware=== #PC with COM port (Windows XP Installed for MPLAB) #ICD2 Programmer #Target Board #5V Power Supply ===Software=== #[http://ww1.microchip.com/downloads/en/...) |
|||
| Line 64: | Line 64: | ||
==Loading Firmware== | ==Loading Firmware== | ||
<!--using Firefox-File-Page_Setup-Format-Scale-85% to print --> | <!--using Firefox-File-Page_Setup-Format-Scale-85% to print --> | ||
| − | ===Java Environment Setup=== | + | ===Java Environment Setup (Once only)=== |
*Download and install the latest JDK or JRE | *Download and install the latest JDK or JRE | ||
**Available from [http://java.sun.com/javase/downloads/index.jsp Sun Microsystems] (e.g. JDK 6 Update 3)<br>[[Image:1 1 java.JPG]]<br> | **Available from [http://java.sun.com/javase/downloads/index.jsp Sun Microsystems] (e.g. JDK 6 Update 3)<br>[[Image:1 1 java.JPG]]<br> | ||
| Line 99: | Line 99: | ||
:::foo.hex is your firmware new file | :::foo.hex is your firmware new file | ||
::[[Image:2 3 command.JPG]] | ::[[Image:2 3 command.JPG]] | ||
| − | + | :*When the program prompt you for an input, press y:<br>[[Image:2 4 prompt.JPG]]<br> | |
| − | + | :*If communication can be established, you should see something like this:<br>[[Image:2 5 progress.JPG]]<br> | |
| − | + | :*Wait until programming is completed.<br>[[Image:2 6 complete.JPG]]<br> | |
| − | + | :*after all completed, power OFF your device, then power ON again, enjoy your new updated. | |
| − | + | ||
| − | + | ==Troubleshooting== | |
| − | *In case of selecting an invalid COM port, you should see the error message:<br>gnu.io.NoSuchPortException: Choosing COM Port Error<br>[[Image:3 1 com err.JPG]]<br> | + | ===Invalid COM Port=== |
| − | + | *In case of selecting an invalid COM port, you should see the error message:<br>gnu.io.NoSuchPortException: Choosing COM Port Error<br>[[Image:3 1 com err.JPG]]<br><br> | |
| − | *In case of selecting a firmware file that does not exist, you should see the error message:<br>java.io.FileNotFoundException: foo1.hex <The system cannot find the file specified><br>[[Image:3 2 file err.JPG]]<br> | + | ===Missing firmware file=== |
| − | + | *In case of selecting a firmware file that does not exist, you should see the error message:<br>java.io.FileNotFoundException: foo1.hex <The system cannot find the file specified><br>[[Image:3 2 file err.JPG]]<br><br> | |
| − | *In case of missing the RXTX driver, you should see the error message:<br>Exception in thread “main” java.lang.NoClassDefFoundError: gnu/io/UnsupportedCommOperationException<br>[[Image:3 3 rxtx err.JPG]]<br> | + | ===Missing RXTX driver=== |
| + | *In case of missing the RXTX driver, you should see the error message:<br>Exception in thread “main” java.lang.NoClassDefFoundError: gnu/io/UnsupportedCommOperationException<br>[[Image:3 3 rxtx err.JPG]]<br><br> | ||
Revision as of 00:49, 22 August 2008
Contents
Requirements
Hardware
- PC with COM port (Windows XP Installed for MPLAB)
- ICD2 Programmer
- Target Board
- 5V Power Supply
Software
- MPLAB IDE v7.50: v7.60 is not compatible with our current ICD2 Programmers. There are consistent "Devices cannot be founded" warnings.
- dsPicProgrammer (dsPicProgrammer.jar)
- RXTX driver: download and upzip rxtx-2.1-7-bins-r2.zip (Final)
Files
- dsPicBootloader (bl_5011.hex). Original assembly code by ingenia can be downloaded from here.
- Application hex file (e.g. app.hex)
Loading Bootloader (Once only)
| Step | Remarks |
|---|---|
| Install MPLAB IDE |
|
| Install USB Driver |
|
| Select Target Chip |
|
| Target <-> ICD 2 |
|
| ICD 2 <-> PC |
|
| Load Bootloader |
|
| Start Programming |
|
| Finishing |
|
Loading Firmware
Java Environment Setup (Once only)
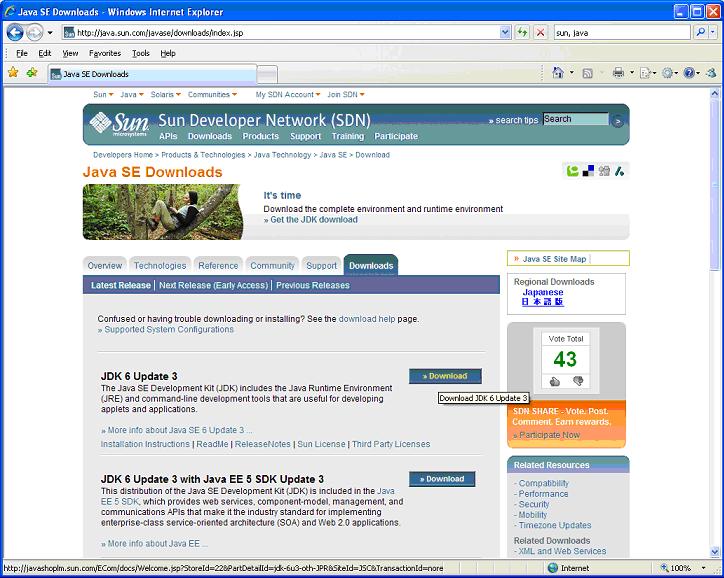
- Download and install the latest JDK or JRE
- Available from Sun Microsystems (e.g. JDK 6 Update 3)
- Available from Sun Microsystems (e.g. JDK 6 Update 3)
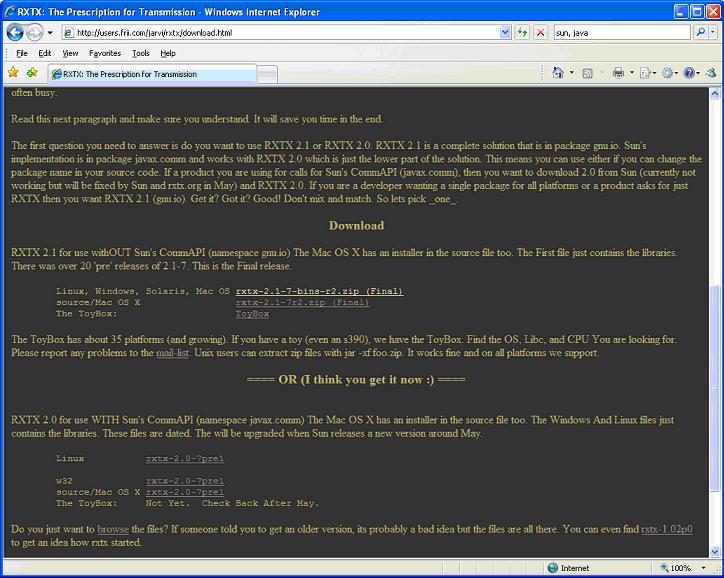
- Download and Extract RXTX Driver
- Available from RXTX
- File: rxtx-2.1-7-bins-r2.zip (Final)
- Extract the files using software such as WinRAR
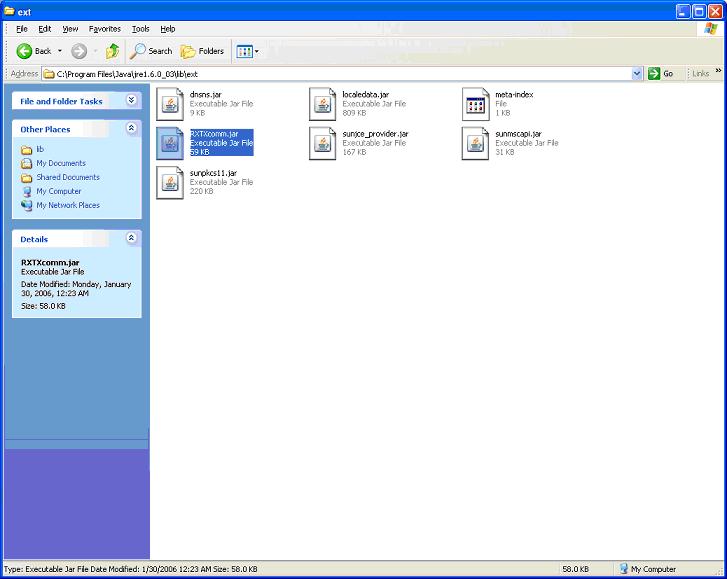
- Copy RXTXcomm.jar to
- For Windows users, C:\Program Files\Java\X\lib\ext (under the latest jre, e.g. X = jre1.6.0_03)
- For Linux users, /usr/lib/jvm/java-version/jre/lib/ext
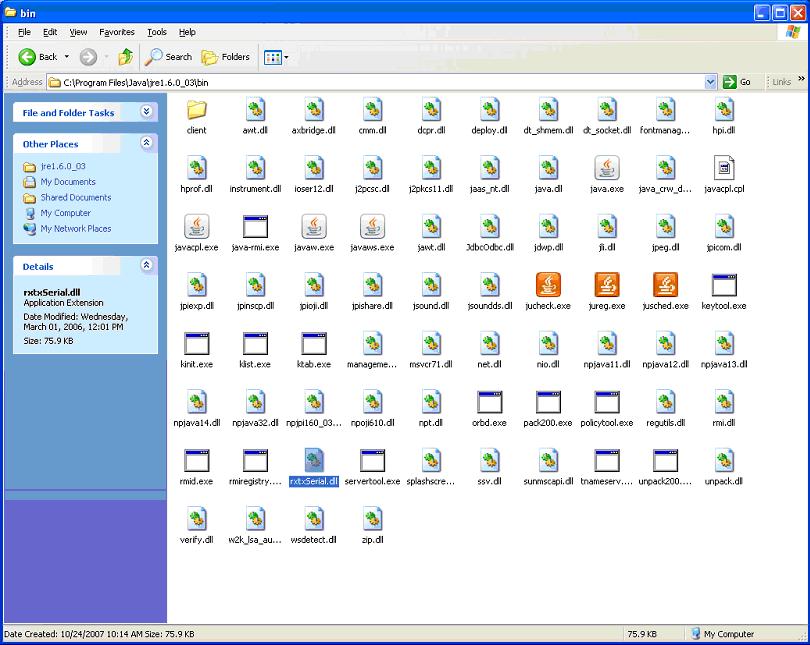
- Copy rxtxSerial.dll/librxtxSerial.so to
- For Windows users, C:\Program Files\Java\X\bin (under the lastest jre, e.g. X = jre1.6.0_03)
- For Linux users, /usr/lib/jvm/java-version/jre/lib/[machine type] (i386 for instance)
- Download dsPicProgrammer


Download Firmware
- Start a Command Prompt
- Start -> Run
File:2 1 run.JPG - Enter cmd
File:2 2 cmd.JPG
- Start -> Run
- Run dsPicProgrammer
- Make sure your device is connected through a "Direct RS232 Cable" to PC Serial Port.
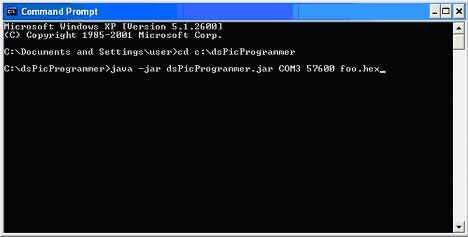
- Change to the directory where dsPicProgrammer.jar is located and run the command:
- [path/to/java/]java -Djava.library.path=[path/to/rxtxlib] -jar dsPicProgrammer.jar COM1 57600 foo.hex
- for example, jre\bin\java -Djava.library.path=.\rxtx\bin -jar dspicProgrammer.jar COM1 57600 foo.hex
- Or directly using dsPicProgrammer.bat COM1 57600 foo.hex(Windows)
- java -jar dsPicProgrammer.jar /dev/ttyS0 57600 foo.hex (Linux)
- [path/to/java/]java -Djava.library.path=[path/to/rxtxlib] -jar dsPicProgrammer.jar COM1 57600 foo.hex
- where COM1 is your COM Port ID
- 57600 is communication speed [in bps]
- foo.hex is your firmware new file
- When the program prompt you for an input, press y:
File:2 4 prompt.JPG - If communication can be established, you should see something like this:
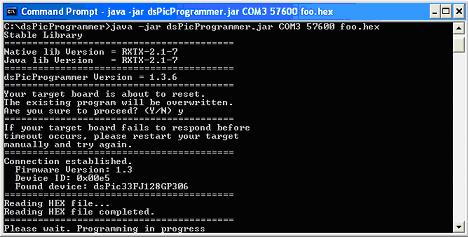
- Wait until programming is completed.

- after all completed, power OFF your device, then power ON again, enjoy your new updated.


Troubleshooting
Invalid COM Port
- In case of selecting an invalid COM port, you should see the error message:
gnu.io.NoSuchPortException: Choosing COM Port Error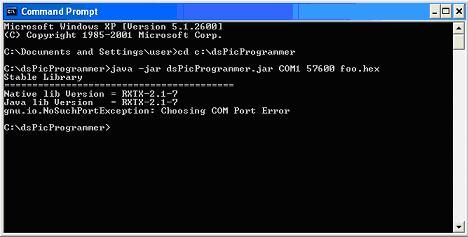

Missing firmware file
- In case of selecting a firmware file that does not exist, you should see the error message:
java.io.FileNotFoundException: foo1.hex <The system cannot find the file specified>

Missing RXTX driver
- In case of missing the RXTX driver, you should see the error message:
Exception in thread “main” java.lang.NoClassDefFoundError: gnu/io/UnsupportedCommOperationException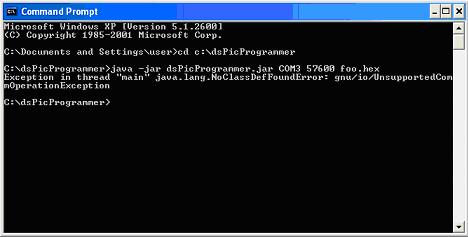
