Difference between revisions of "GEDA Quickstart"
Jump to navigation
Jump to search
(starting point) |
(typo) |
||
| (3 intermediate revisions by the same user not shown) | |||
| Line 5: | Line 5: | ||
Start 'gschem schematic.sch' | Start 'gschem schematic.sch' | ||
:Edit/Create your circuit | :Edit/Create your circuit | ||
| + | :[[Image:Geda_gschem.png|thumb|right|250px|gschem - schematic editor]] | ||
Start 'gsch2pcb schematic.sch' | Start 'gsch2pcb schematic.sch' | ||
| − | Start 'pcb' | + | <pre> |
| + | ~ >gsch2pcb demo.sch | ||
| + | |||
| + | ---------------------------------- | ||
| + | Done processing. Work performed: | ||
| + | 0 file elements and 4 m4 elements added to demo.pcb. | ||
| + | |||
| + | Next steps: | ||
| + | 1. Run pcb on your file demo.pcb. | ||
| + | You will find all your footprints in a bundle ready for you to place. | ||
| + | |||
| + | </pre> | ||
| + | Start 'pcb demo.pcb' | ||
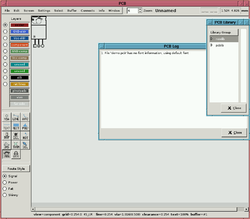
| + | :[[Image:Geda_pcb.png|thumb|right|250px|pcb - pcb editor]] | ||
| + | :File/Load netlist file "demo.net" | ||
| + | :Select/Select all objects (Alt+A) | ||
| + | :Select/Auto place selected elements (Ctrl+P) | ||
| + | :File/Print layout | ||
| + | :[[Image:Geda_pcb_print_layout.png|thumb|right|250px|pcb - print dialog]] | ||
:Print the result as Postscript or Gerber files. | :Print the result as Postscript or Gerber files. | ||
Latest revision as of 04:46, 31 July 2007
Add a file called "gschemrc":
(log-window "later")
Start 'gschem schematic.sch'
- Edit/Create your circuit
Start 'gsch2pcb schematic.sch'
~ >gsch2pcb demo.sch

----------------------------------
Done processing.  Work performed:
0 file elements and 4 m4 elements added to demo.pcb.

Next steps:
1.  Run pcb on your file demo.pcb.
    You will find all your footprints in a bundle ready for you to place.
Start 'pcb demo.pcb'
- File/Load netlist file "demo.net"
- Select/Select all objects (Alt+A)
- Select/Auto place selected elements (Ctrl+P)
- File/Print layout
- Print the result as Postscript or Gerber files.


